
Key Takeaways
- Most NSW break-ins occur through side gates and rear accessways hidden from street view, not front doors.
- Correct CCTV camera positioning means mounting at 2.5–3 metres with a 15–30 degree downward tilt for facial ID.
- Two corner-mounted cameras with overlapping fields of view eliminate dead zones in side passages up to 10 metres.
- A 2.8mm wide-angle lens suits accessways under 8 metres; varifocal lenses suit longer or irregular passages.
- ColorVu or Starlight cameras capture full-colour identification footage in dark side passages after dark.
- Licensed security installers in NSW and SA must hold a Master Licence under state security legislation.
Why Do Side Gates and Rear Accessways Attract Break-Ins?
The best CCTV camera positioning to eliminate side access and blind spot risks combines corner-mounted cameras at 2.5 to 3 metres, tilted downward 15 to 30 degrees, with overlapping fields of view so no gap exists along narrow passages. This setup captures identifiable faces at every approach point intruders actually use.
Yet when we attend homes across Sydney and regional NSW for assessments, the pattern is remarkably consistent. Cameras guard the front door and the driveway, while the very areas burglars prefer sit completely uncovered. The result is a system full of expensive hardware that records the postman in crisp detail but misses the actual point of entry.
This guide sets out the camera angles, heights, lens selections and positioning strategies our licensed installers use on every job — whether it is a single-storey brick veneer home in the suburbs or a larger rural property with sheds, tanks and multiple outbuildings.
What Is the Best CCTV Camera Positioning Setup for Side Access?
For homeowners who want the direct answer up front: the best setup for side access combines corner-mounted [[4k-vs-1080p-security-cameras-is-the-upgrade-worth-the-money|cameras]] positioned at 2.5 to 3 metres, tilted downward between 15 and 30 degrees, with overlapping fields of view so no gap exists along the passage. Pair this with a wide-angle or varifocal lens suited to the distance involved, and choose ColorVu or Starlight technology if the area is dark at night.
That single configuration solves the three problems that ruin most DIY installations: angles too steep to identify faces, gaps between [[front-door-camera-placement-how-to-capture-faces-not-the-top-of-heads|camera]] views, and night footage too dark or grainy to be useful. Everything else in this article explains how to apply these principles to your specific layout.
How Do You Map Blind Spot Cameras Coverage Before Installation?
Before a single bracket goes on a wall, you need an honest map of where your property is exposed. Walk the full perimeter and note every approach path where someone could move toward your home without being seen from the street or from inside. Typical trouble spots include the narrow strip between the house and the boundary fence, rear courtyards screened by fencing or planting, garage side doors, laundry windows, and anything concealed behind sheds, rainwater tanks or dense garden beds.
Elevation changes deserve special attention. A camera mounted under the eaves may cover a flat pathway beautifully, yet a retaining wall, staircase or sloped garden bed can throw a shadow zone where a crouching person disappears entirely. What looks covered on paper often is not once terrain enters the equation.
At Aussie CCTV Cams, every installation starts with a physical walk-through of the property. We trace the routes an intruder would realistically take, mark each blind spot on a coverage plan, and only then design the camera layout. It is the step DIY installations skip most often, and it is the one that determines whether the finished system actually works. Licensed under the [[how-to-position-cameras-to-comply-with-australian-privacy-expectations|Security]] Industry Act, Aussie CCTV Cams ensures every installation satisfies Australia's Privacy Act requirements.
Which Security Camera Angles Capture Faces Along Narrow Side Passages?
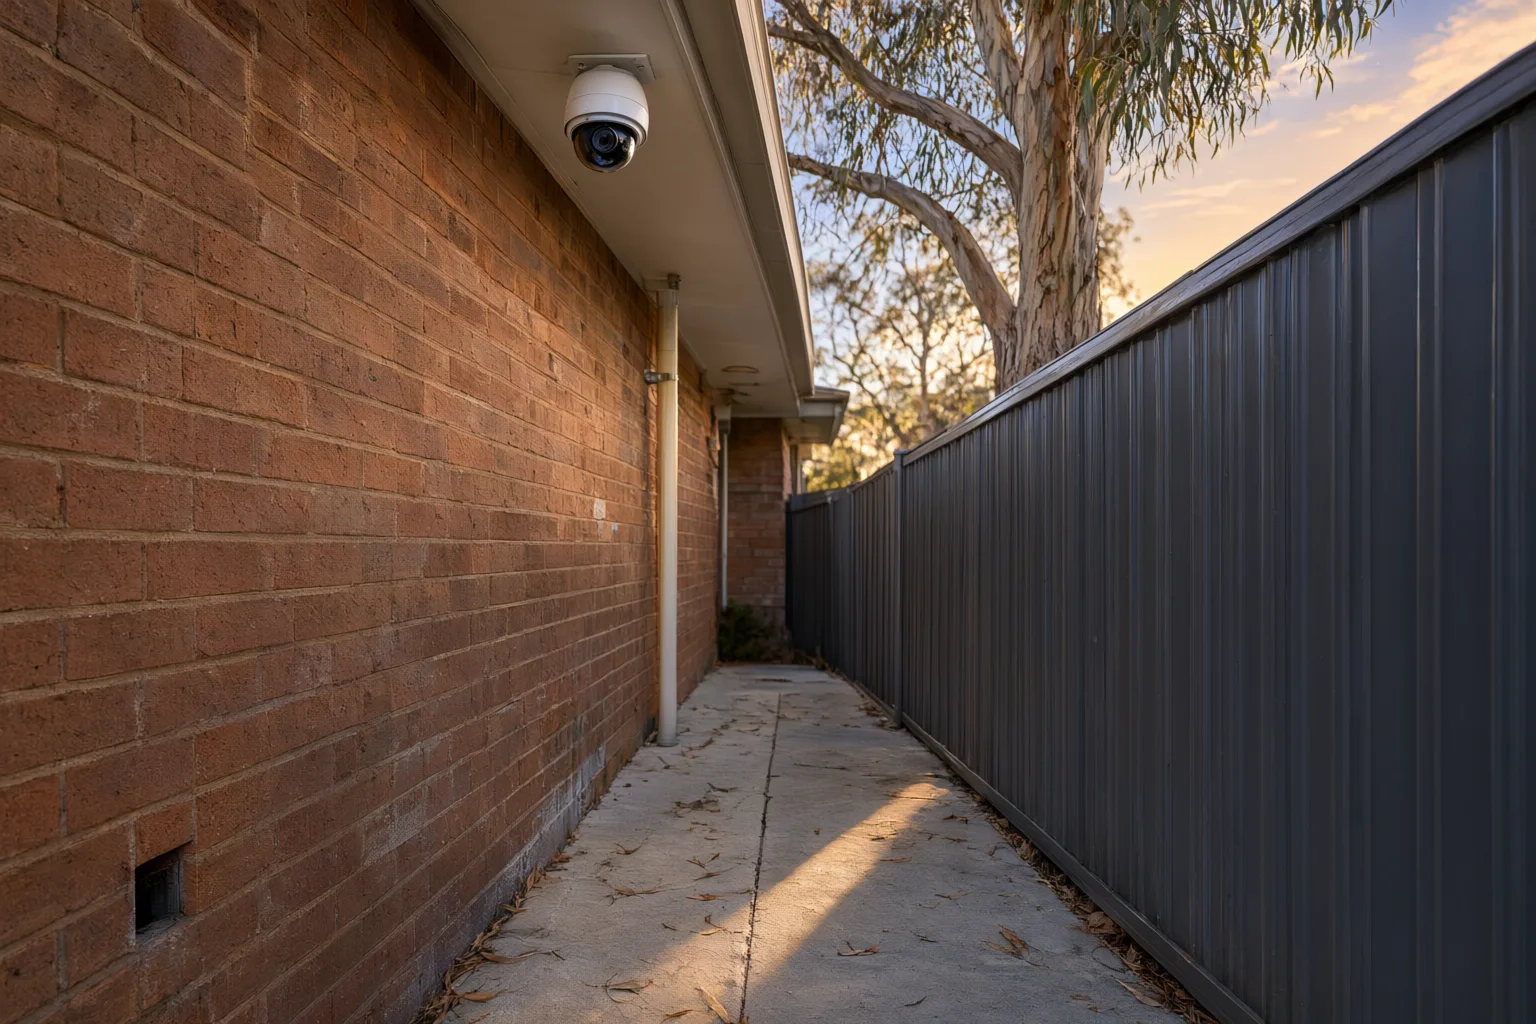
Angle selection separates footage that identifies a person from footage showing a vague shape shuffling past. For a narrow side passage, the most effective arrangement uses two cameras working as a pair. Mount the first on the front corner of the house, aimed down the length of the passage toward the rear. This records anyone entering from the street side and follows their movement along the entire flank of the home. Mount the second on the rear corner aimed back toward the front, and the two fields of view overlap completely with no dead zone between them.
Where the property has a wider side yard, or a gate set back from the front fence line, position the camera directly above or beside the gate at 2.5 to 3 metres and tilt it downward roughly 15 to 30 degrees. At that angle, the lens captures facial features as someone approaches and passes through — not just the crown of their head.
Resist the temptation to go higher. A camera bolted at the roofline feels like it should see more, but anything above about 3.5 metres produces steep top-down imagery that makes identification extremely difficult. Between 2.5 and 3 metres remains the sweet spot for residential work: high enough to be out of casual reach, low enough to keep faces recognisable.
- Front corner mount aimed down the passage for full-length coverage
- Rear corner mount aimed back toward the front to overlap fields of view
- Gate-mounted cameras at 2.5 to 3 metres for reliable facial capture
- 15 to 30 degree downward tilt for identification-grade footage
- Avoid mounts above 3.5 metres, which create steep, unusable angles
Can Lens Type Match the Length of Your Accessway?
Lens choice dictates how much ground a camera covers and how much detail survives at distance. Three options cover virtually every side-access scenario we encounter.
A fixed 2.8mm wide-angle lens delivers a field of view around 100 to 110 degrees. It suits short passages where the camera sits close to the monitored area. The compromise is that subjects further away shrink and lose detail quickly.
A varifocal lens ranging from 2.7mm to 13.5mm can be tuned during installation to match the exact dimensions of the space. This is our default recommendation for most side access jobs because it removes wasted coverage and concentrates resolution exactly where identification matters.
For long driveways or passages stretching 15 metres or more, a motorised varifocal bullet camera with optical zoom provides the reach needed for identifiable detail at range. Hikvision and Dahua both offer strong options here, with AcuSense-style analytics filtering out false triggers caused by animals, shifting shadows and moving foliage.
Is Night Footage Usable in Dark Side Passages?
Side accessways are usually the darkest parts of any property. Streetlight spill rarely reaches them, and the house itself shades them through much of the day. Standard infrared cameras respond by switching to black-and-white recording, which strips away clothing colours, vehicle details and other features that make identification easier.
We specify ColorVu or Starlight technology for these zones. ColorVu cameras pair a large-aperture lens with gentle supplemental lighting to maintain full-colour recording even in very low light. Starlight sensors capture colour images in near-darkness without adding any visible light at all.
If you would rather not run a light all night, combine a Starlight camera with a motion-activated sensor light. The camera records continuously in low light, and the moment movement is detected, the sensor light floods the area — giving you discreet operation by default and bright, colour-rich footage exactly when it counts.
Do Positioning Mistakes Ruin Otherwise Good Systems?
Quality hardware still produces rubbish footage when it is pointed the wrong way. These are the faults we fix most often when upgrading DIY or poorly installed systems.
Aiming a camera at a light source — a porch light, a bright window, a west-facing wall at sunset — causes lens flare and washes out the image entirely. Keep light sources behind or beside the camera, never in frame ahead of it.
Trying to cover too much with one camera is equally common. A single unit watching an entire backyard from one corner will tell you someone is there, but at 20 metres with a wide-angle lens it will not tell you who. Two cameras with tighter, purposeful angles beat one camera attempting everything.
Seasonal change is the mistake nobody plans for. An angle that performs perfectly in summer can be blocked by foliage growth by autumn, or blinded by glare from the lower winter sun. We design every position around year-round Australian conditions, including summer heat, coastal salt air and storm exposure.
- Never aim cameras directly at light sources or reflective windows
- Do not expect one wide-angle camera to identify people across large distances
- Plan for seasonal foliage growth and changing sun angles
- Keep cameras out of easy reach to prevent tampering
- Test recorded footage at night as well as by day before finalising positions
Are These the Recommended Angles and Heights by Location?
The table below summarises the mounting heights, tilt angles and lens types we recommend for the most common blind spot locations around Australian homes. Treat it as a starting point — final settings should always be confirmed against your specific layout during a site assessment.
Why Does Professional CCTV Camera Positioning Deliver Better Angles?
Choosing a camera angle is not guesswork. It draws on lens geometry, lighting behaviour, intruder patterns and the particular layout of your block. A shift of ten degrees in tilt, or half a metre in height, can be the difference between a clear face and an unusable blur.
Our five-step installation process opens with a free on-site consultation. We walk the property, log every blind spot, and design a layout delivering complete overlapping coverage. We then install professional-grade Hikvision, Dahua, Uniview or Axis equipment, configure remote viewing on your phone, and walk you through the whole system at handover so you know precisely how to use it.
Every installation carries our lifetime support guarantee. If an angle needs fine-tuning after installation, or you want to extend coverage to a new area later, we are one phone call away.
Should You Get a Professional Blind Spot Assessment in Newcastle or Adelaide?
Recommended Camera Angles by Location
| Location | Mounting Height | Tilt Angle | Recommended Lens | Best Camera Type |
|---|---|---|---|---|
| Narrow side passage | 2.5 to 3 metres | 15 to 20 degrees | 2.8mm wide-angle or varifocal | Turret or bullet |
| Side gate entry | 2.5 to 3 metres | 20 to 30 degrees | 2.8mm wide-angle | Turret with ColorVu |
| Rear courtyard | 2.5 to 3.5 metres | 15 to 25 degrees | Varifocal 2.7 to 13.5mm | Bullet with AcuSense |
| Driveway side access | 2.5 to 3 metres | 15 to 20 degrees | Varifocal or motorised zoom | Bullet with ANPR option |
| Garage side door | 2.5 metres | 20 to 30 degrees | 2.8mm wide-angle | Turret with Starlight |