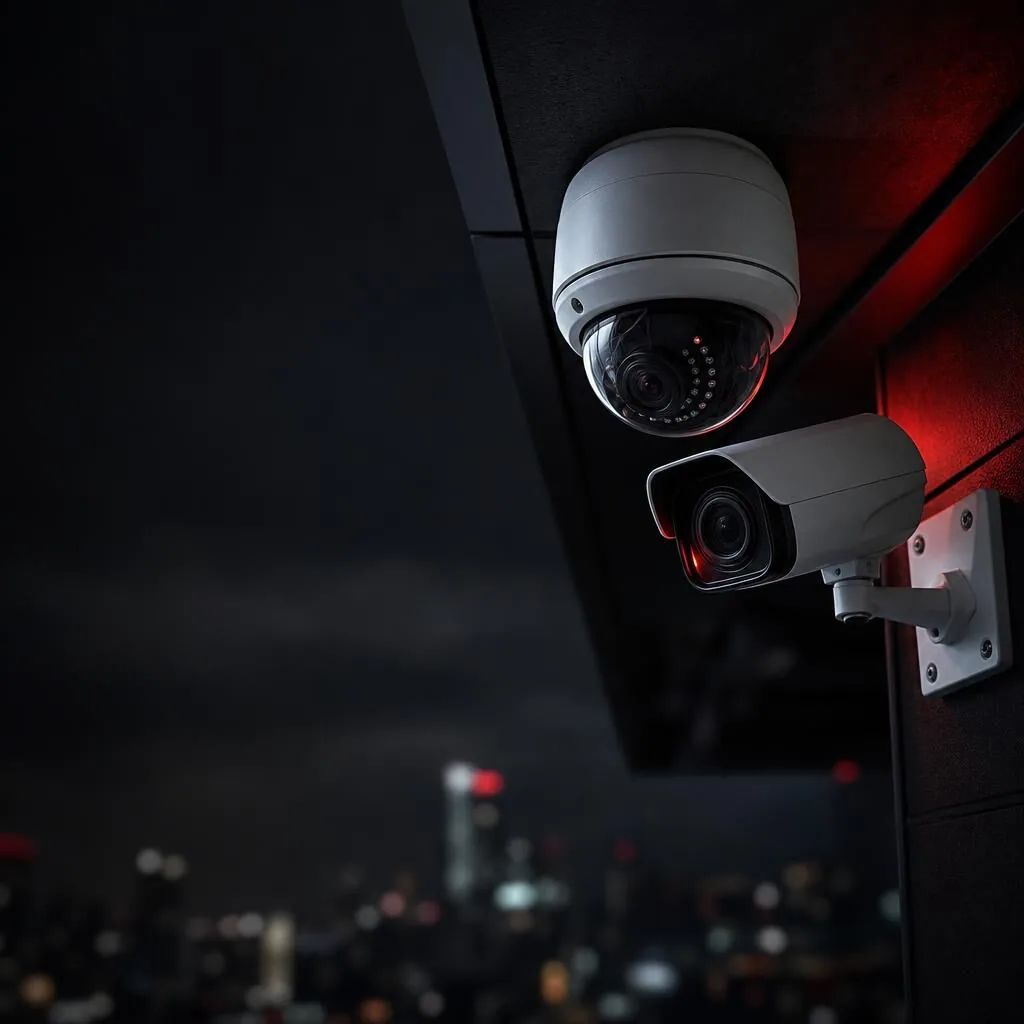
Key Takeaways
- Mount cameras between 1.6m and 2.1m high to capture faces, not scalps
- Position cameras 2 to 3 metres from the door for optimal identification distance
- Angle the lens 15 to 30 degrees downward to capture approach paths
- Avoid backlighting from the afternoon sun by facing north or south where possible
- Use a camera with at least 4MP resolution and WDR for Australian porch conditions
- Combine a dedicated face camera with a wide-angle overview camera for complete coverage
Why Most Front Door Cameras Fail to Capture Faces
We see it constantly across Sydney and regional NSW: a homeowner invests in a quality security system, mounts the camera high under the eaves for a 'better view', and ends up with crystal-clear footage of the top of a visitor's head. When a package goes missing or an unwanted caller arrives, that footage is useless for identification.
The problem is geometry. When a camera is mounted at 2.4 metres or higher and pointed downward to cover the doorstep, the angle becomes too steep. By the time a person is close enough to ring the bell, you are looking directly down at their crown. Facial features are obscured by the forehead and hat brims, and shadows from the porch roof often darken the face entirely.
For NSW Police to use your footage in an investigation, they need a clear, front-on view of the face at a reasonable resolution. That means rethinking the traditional 'high and wide' approach and treating your front door camera as a dedicated identification tool, not just a general overview.
The Optimal Height for Front Door Camera Placement
The sweet spot for facial capture is between 1.6 and 2.1 metres from the ground. This places the lens at roughly chest to eye level for the average adult, allowing the camera to look slightly up at visitors rather than down on them. At this height, you capture the full face as someone approaches the door, not just when they are standing directly underneath the camera.
If you have a raised porch or steps, measure from the landing where visitors actually stand, not from the ground below. For homes with a portico or verandah, mounting on the wall beside the door at 1.8 metres often works better than mounting on the ceiling above.
For units and townhouses where body corporate rules restrict external mounting, a peephole camera or a discreet doorbell camera positioned at 1.5 metres can achieve similar results without drilling into common property.
Distance and Angle: Getting the Geometry Right
Height is only half the equation. The distance between the camera and the subject determines how large the face appears in the frame. For reliable identification, you want the face to occupy at least 15 to 20 percent of the image height.
With a standard 2.8mm or 4mm lens, this means positioning the camera 2 to 3 metres from where visitors stand. If your porch is narrow, mount the camera on the adjacent wall rather than directly above the door. This lateral position captures visitors as they approach along the path, giving you multiple frames of their face before they reach the doorstep.
Angle the camera 15 to 30 degrees downward. This compensates for the slight upward tilt needed at lower mounting heights and ensures you capture the approach path, not just the doorstep. Avoid the temptation to cover the entire front yard with one camera; that is the job of a second, wider-angle camera mounted higher up.
Dealing with Australian Light and Weather Conditions
Australian light is harsh. A front door that faces west will be blasted with afternoon sun, creating strong backlighting that turns visitors into silhouettes. East-facing doors have the same problem in the morning. If your camera faces the sun, no amount of resolution will save the image.
Look for cameras with Wide Dynamic Range (WDR) or, better yet, Hikvision's ColorVu or Dahua's Full-colour technology. These sensors balance bright backgrounds with shadowed faces, which is essential for covered porches where the visitor is in shade but the background is bright.
For coastal homes from Wollongong to Newcastle, salt air corrodes cheap housings quickly. Choose cameras with an IP67 rating and corrosion-resistant brackets. In bushfire-prone areas, ensure cables are run in metal conduit and the camera housing is ember-resistant. Our installers always use UV-stable cabling and sealed junction boxes for NSW conditions.
Camera Specifications That Actually Matter for Identification
Resolution is important, but it is not the only factor. A 4MP camera at the right height will outperform an 8MP camera mounted poorly. That said, for front door identification, we recommend a minimum of 4MP (2688 x 1520) with a 2.8mm or 4mm fixed lens. This gives you enough pixels to zoom in on a face without excessive digital noise.
Infrared (IR) night vision is standard, but check the IR range. For a typical suburban porch, 10 to 15 metres is sufficient. If your entrance is set back from the street, consider a camera with ColorVu or Starlight technology, which captures full-colour images in low light without the ghostly white IR glow that can wash out facial features.
Power over Ethernet (PoE) is strongly preferred over Wi-Fi for front door cameras. A hardwired connection is immune to NBN dropouts and provides consistent power for 24/7 recording. If running cable is impossible, a quality wireless camera with a strong signal and local SD card backup is acceptable, but expect to recharge batteries or rely on solar panels in shaded entryways.
Common Front Door Camera Placement Mistakes to Avoid
The most frequent error is mounting the camera too high 'to prevent tampering'. While security is a concern, a camera at 2.4 metres that captures no faces is less valuable than a camera at 1.8 metres that captures clear identification. Use a vandal-resistant dome or a camera with a protective housing if tampering is a worry.
Another mistake is pointing the camera directly at a glass door or sidelight. Reflections during the day and IR bounce-back at night will obscure the image. Angle the camera slightly away from glass, or use a camera with adjustable IR intensity.
Finally, do not rely on a single camera to do everything. A wide-angle camera covering the driveway and a dedicated face camera at the door is the professional standard. This dual-camera approach is what we design for most Sydney homes, ensuring you have both context and identification.
When to Call a Professional Installer
If your front door has complex architecture, multiple entry points, or you need to integrate the camera with an intercom or access control system, professional design is worth the investment. Our licensed NSW installers assess sightlines, lighting, and cable paths during a free on-site consultation.
We often find that the ideal position for facial capture conflicts with aesthetics or body corporate rules. A professional can recommend discreet housings, paintable brackets, or alternative positions that satisfy both security and strata requirements.
With our 5-step installation process, we handle everything from initial design to final handover and training. You get a system that captures faces, not frustration, backed by lifetime support and professional-grade hardware from Hikvision, Dahua, Uniview and Axis.
Front Door Camera Placement: Recommended Specifications
| Parameter |
Recommended Range |
Why It Matters |
| Mounting Height |
1.6m – 2.1m |
Captures faces at eye level rather than the top of the head |
| Distance from Door |
2m – 3m |
Ensures face occupies 15-20% of frame for reliable ID |
| Vertical Angle |
15° – 30° downward |
Covers approach path while maintaining facial visibility |
| Minimum Resolution |
4MP (2688 x 1520) |
Sufficient pixel density for facial recognition and police evidence |
| Lens Focal Length |
2.8mm – 4mm |
Balances field of view with subject size at typical porch depths |
| Night Vision |
ColorVu or Starlight preferred |
Full-colour low-light imaging without IR washout on faces |
Key Takeaways
- Map every camera position back to your NVR before drilling a single hole
- Roof cavities and wall cavities offer the cleanest hidden cable routes
- Use conduit and weatherproof glands for any externally exposed cable sections
- Cat6 Ethernet with PoE simplifies cabling by combining power and video in one run
- Keep cable runs under 100 metres to maintain signal integrity on IP systems
- Licensed installers ensure compliance with Australian cabling regulations
Why Cable Planning Makes or Breaks Your CCTV Installation
The difference between a professional CCTV installation and an amateur one rarely comes down to the cameras themselves. It comes down to the cabling. Visible wires running along external walls, dangling cables under eaves, and messy connections at junction boxes instantly cheapen the look of your property and signal to potential intruders exactly where your system lives.
A well-planned cable run keeps every metre of wiring hidden inside roof cavities, wall spaces, or sealed conduit. It protects your cables from UV damage, moisture, rodents, and deliberate tampering. In Australian conditions, where summer heat in roof spaces can exceed 60 degrees Celsius and coastal salt air corrodes exposed connections within months, proper cable planning is not just about aesthetics. It is about system longevity and reliability.
Before any drilling begins, a licensed installer will walk your property and map the most efficient route from each camera position back to the NVR or DVR location. This planning phase typically takes 30 to 60 minutes and saves hours of frustration during installation.
Start With a Site Map of Camera and NVR Positions
Every clean CCTV installation begins on paper. Sketch a rough floor plan of your property and mark where each camera will be mounted. Then identify where your NVR will live. This is typically a locked cupboard, a home office, or a garage shelf with adequate ventilation and a nearby power point.
Once both endpoints are marked, trace the shortest practical path between them. In most Australian homes, particularly single-storey brick veneer properties with accessible roof cavities, the ceiling space is your best friend. Cables can run from the NVR location up through a wall cavity, across the roof space, and drop down at each camera position with only a small, neatly drilled hole visible at the eave or external wall.
For two-storey homes, the planning becomes more complex. Upper-floor cameras may need cables routed through the wall cavity between floors or along external conduit painted to match your Colorbond or brick colour. A professional installer will assess access points, insulation type, and any fire-rated walls that require special sealing.
Choosing the Right Cable Type for Your System
The cable you choose determines both the quality of your footage and how easily it can be concealed. For modern IP camera systems, Cat6 Ethernet cable is the standard choice. It carries both power and video data through Power over Ethernet, meaning you only need one cable per camera. This halves the number of runs you need to hide and simplifies the entire installation.
Cat6 supports runs up to 100 metres without signal degradation, which covers the vast majority of residential and small commercial properties. For longer runs on rural properties or large warehouses, a PoE extender or fibre optic link may be necessary.
For older analogue systems, RG59 coaxial cable with a separate power cable is still used, though most professional installers now recommend upgrading to IP. If you are running cables through areas with high electromagnetic interference, such as near large motors or switchboards, shielded cable or conduit provides additional protection.
Best Routes for Hiding CCTV Cables in Australian Homes
The most common concealment routes in Australian residential installations include roof cavities, wall cavities, under-floor spaces in homes with raised timber floors, and along fence lines in buried conduit for detached structures like sheds or granny flats.
Roof cavities are the gold standard for single-storey homes. Your installer will enter through the manhole, run cables along the top plate of internal walls, and drill down through the external wall top plate to reach each camera position. The only visible evidence is a neat bead of colour-matched silicone sealant around the camera base.
Wall cavities work well when the camera is mounted directly below the roof line. The cable drops straight down from the roof space through the cavity and exits at the camera mounting point. This requires a stud finder to avoid noggins and any existing wiring or plumbing inside the wall.
For external runs that cannot be avoided, such as crossing from the main house to a detached garage, UV-stable conduit is essential. Choose conduit that matches your wall or eave colour, or paint it after installation. Secure it with saddle clips every 600 millimetres to prevent sagging and wind movement.
- Roof cavity: ideal for single-storey homes, completely invisible from outside
- Wall cavity: clean vertical drops from roof space to camera position
- Under-floor: suitable for raised timber homes with accessible subfloor
- Buried conduit: required for runs to detached buildings, dig to 300mm minimum
- External conduit: last resort, always use UV-stable and colour-matched
Weatherproofing and Protecting Cable Entry Points
Every point where a cable passes through an external wall or eave is a potential entry point for water, insects, and rodents. Professional installers use weatherproof cable glands or silicone-sealed grommets at every penetration. In coastal areas from Byron Bay to Wollongong, salt air accelerates corrosion on any exposed metal connector, so sealed junction boxes with IP66 or higher ratings are essential.
Bushfire-prone zones add another layer of consideration. Cables running through roof spaces in BAL-rated areas should be routed away from potential ember entry points, and any external conduit should be metal rather than PVC to resist radiant heat.
Rodent damage is one of the most common causes of CCTV cable failure in Australian homes. Rats and possums in roof cavities will chew through unprotected cable insulation. Running cables through flexible conduit or securing them tightly along timber framing with cable clips reduces the risk significantly.
Common Cable Planning Mistakes to Avoid
The most frequent mistake in DIY CCTV installations is running cables along the shortest visual path rather than the shortest concealed path. A cable stapled along an external wall might save 20 minutes during installation, but it looks unprofessional, deteriorates faster in direct sunlight, and can be cut in seconds by anyone with basic tools.
Another common error is exceeding the 100-metre limit on Cat6 runs. This causes intermittent dropouts, reduced video quality, and cameras that randomly disconnect. Always measure the actual cable path, including vertical rises and detours around obstacles, rather than estimating the straight-line distance.
Finally, never run CCTV cables in the same conduit or bundle as 240V mains wiring. This violates Australian cabling standards, creates interference on analogue systems, and poses a genuine safety risk. Maintain at least 50 millimetres of separation between low-voltage data cables and mains power.
Why Professional Installation Delivers a Cleaner Result
A licensed CCTV installer brings tools and experience that make hidden cable runs faster and cleaner. Flexible drill bits reach through wall cavities without removing plasterboard. Inspection cameras identify obstructions before drilling. Cable rods and glow rods push wiring through roof spaces without the installer needing to crawl into every corner.
At Aussie CCTV Cams, our five-step installation process begins with a detailed site consultation where we map every cable route before any work begins. We use professional-grade Hikvision and Dahua hardware with PoE to minimise cable count, and every external penetration is sealed and weatherproofed to withstand Australian conditions. Our installations are fully licensed and insured, and every job includes lifetime support.
CCTV Cable Types Compared for Hidden Installations
| Cable Type |
Best For |
Max Run Length |
Power + Video in One |
Concealment Ease |
| Cat6 Ethernet (PoE) |
Modern IP camera systems |
100 metres |
Yes |
Excellent, single thin cable |
| Cat5e Ethernet (PoE) |
Budget IP installations |
100 metres |
Yes |
Excellent, slightly thinner |
| RG59 Coaxial + 12V |
Legacy analogue systems |
150 metres (video) |
No, two cables needed |
Moderate, thicker bundle |
| Fibre Optic |
Long rural or commercial runs |
Up to 2 km |
No, data only |
Requires specialist termination |
Key Takeaways
- A standard 4-camera home CCTV system installed professionally costs $1,200–$4,500 in Australia.
- Commercial installations range from $3,000 for small shops to $15,000+ for warehouses and multi-site setups.
- Hardware brand, camera resolution, cabling difficulty and NVR storage are the biggest cost drivers.
- Professional-grade Hikvision, Dahua, Uniview and Axis systems outlast cheap DIY kits in Australian heat and coastal conditions.
- Always use a licensed and insured installer — NSW requires a security licence for CCTV installation work.
- A free on-site quote is the only accurate way to price your property's layout and cabling runs.
Average CCTV Installation Costs in Australia
If you're budgeting for security cameras, the short answer is this: most Australian homeowners pay between $1,200 and $4,500 for a professionally installed CCTV system, while businesses typically invest $3,000 to $15,000 or more depending on site size and camera count.
That range is wide because every property is different. A single-storey brick veneer home with easy roof access is a very different job to a two-storey rendered house on a sloping block, or a warehouse with 20-metre cable runs and scissor lift requirements. Below, we break down exactly where the money goes so you can compare quotes with confidence.
What Drives the Cost of a CCTV System?
Five factors account for almost all of the variation between a cheap quote and a premium one. Understanding them helps you spot where a low quote has cut corners — or where a high quote is genuinely earning its price.
- Camera count and resolution: 4MP cameras are the current sweet spot; 4K (8MP) cameras cost more per unit and need more storage.
- Hardware brand and tier: professional-grade Hikvision, Dahua, Uniview and Axis cameras cost more upfront than consumer DIY kits but last years longer in Australian heat and coastal salt air.
- Cabling complexity: double-storey homes, flat Colorbond roofs, long runs to sheds or gates, and rendered walls all add labour time.
- Recorder and storage: an 8-channel NVR with a 4TB surveillance-grade hard drive costs more than a basic 4-channel unit with 1TB.
- Smart features: AcuSense human/vehicle detection, ColorVu full-colour night vision, ANPR number plate recognition and remote viewing setup all add value — and cost.
Home CCTV Installation Costs by System Size
For residential properties, pricing scales fairly predictably with camera count. A four-camera system covering the front door, driveway, backyard and side access is the most common configuration we install across NSW homes.
Smaller two-camera setups suit units and townhouses, while larger homes on acreage or corner blocks often need six to eight cameras to eliminate blind spots. All professional systems should include a PoE (Power over Ethernet) NVR, surveillance-grade hard drive, remote viewing app configuration and a proper handover so you know how to use the system.
Commercial CCTV Installation Costs
Commercial pricing is more variable because sites differ so much. A small retail shopfront might need four to six cameras with ANPR at the entrance, while a warehouse or construction site could require 16 to 32 cameras, long-range PoE switches, and cameras rated for dust, vibration and wide temperature swings.
Businesses should also budget for features homeowners rarely need: integration with access control and alarm systems, point-of-sale camera overlays for retail, and remote monitoring services. The good news is that commercial-grade hardware from Axis, Hikvision and Dahua is built for 24/7 operation and typically pays for itself through reduced shrinkage, fewer false insurance claims and lower security guard costs.
DIY Kits vs Professional Installation: The Real Cost
Consumer DIY camera kits from electronics retailers look tempting at $300 to $800, but the true cost comparison isn't close. Battery-powered Wi-Fi cameras struggle with Australian summer heat, drop off congested home Wi-Fi networks, and often record to cloud subscriptions that cost $10 to $30 per camera per month — forever.
A professionally installed wired PoE system has no batteries to charge, no Wi-Fi dropouts, no mandatory subscriptions, and records continuously to a local NVR you own outright. In NSW, hard-wired CCTV installation must legally be carried out by a licensed security installer, so a DIY kit that needs cabling through walls isn't even a legal DIY job. When you factor in lifespan — professional cameras routinely run 7 to 10 years versus 2 to 3 for consumer gear — the professional system is usually cheaper per year of service.
Hidden and Ongoing Costs to Budget For
A transparent quote should include everything, but it's worth knowing the line items that sometimes get missed. Surveillance-grade hard drives (like WD Purple or Seagate SkyHawk) are essential — standard desktop drives fail quickly under constant recording. If your switchboard or roof cavity needs extra work for safe cable routing, that adds labour.
Ongoing costs are minimal for wired systems: occasional lens cleaning, a hard drive replacement every 3 to 5 years, and firmware updates. Many installers, including our team, offer lifetime support so you're never paying call-out fees just to get help with the app. If you want professional monitoring or alarm integration, budget an additional monthly fee.
How to Get an Accurate Quote for Your Property
Online estimates are a starting point, but the only accurate price comes from an on-site assessment. A proper installer will walk your property, identify entry points and blind spots, check roof access and cable pathways, and ask how you want to use the system — live viewing, evidence-grade recording, or active deterrence with lights and sirens.
Our five-step process keeps it simple: consult, design, install, configure, and hand over with full training. You'll receive an itemised quote naming the exact camera models, NVR, storage size and warranty terms, so you can compare apples with apples. Quotes are free, and because we're fully licensed and insured NSW installers, the work is compliant from day one.
CCTV Installation Cost Breakdown by Property Type
| Property Type |
Cameras |
Typical Hardware |
Installed Price Range |
| Unit / townhouse |
2–4 |
4MP PoE cameras, 4-ch NVR, 1–2TB |
$900 – $2,200 |
| Standard single-storey home |
4–6 |
4MP–4K cameras, AcuSense NVR, 2–4TB |
$1,200 – $4,500 |
| Large / two-storey home |
6–8 |
4K ColorVu cameras, 8-ch NVR, 4–6TB |
$3,000 – $6,500 |
| Small retail / office |
4–8 |
4MP cameras + ANPR option, 8-ch NVR |
$3,000 – $7,000 |
| Warehouse / industrial |
8–16+ |
Varifocal + PTZ cameras, 16–32-ch NVR, 8TB+ |
$6,000 – $15,000+ |
| Farm / rural site |
4–12 |
Solar + 4G cameras, long-range wireless links |
$4,000 – $12,000+ |
Key Takeaways
- NVRs record digital IP cameras via network cable; DVRs record analogue cameras via coaxial cable.
- NVR systems support 4K+ resolution, Power over Ethernet (PoE) and AI features like AcuSense human detection.
- DVR systems remain a cost-effective option when quality coaxial cabling is already installed.
- PoE lets a single cable carry power and video, simplifying installation in Australian homes.
- Hybrid recorders can bridge old analogue cameras and new IP cameras during a staged upgrade.
- A licensed installer can assess your existing cabling and recommend the most cost-effective path.
What Is the Difference Between an NVR and a DVR?
The recorder is the heart of any CCTV system — it stores your footage, manages your cameras and powers your remote viewing app. The two main types are the NVR (Network Video Recorder) and the DVR (Digital Video Recorder), and the fundamental difference comes down to how video reaches the box.
A DVR processes analogue video signals sent over coaxial cable from older-style cameras. The recorder itself does the heavy lifting of converting that analogue signal into digital files. An NVR, by contrast, receives already-digital video from IP (Internet Protocol) cameras over standard network cabling — the camera encodes the video, and the NVR simply records and manages it.
This single distinction drives almost every other difference: image quality, cabling, smart features, scalability and price. Understanding it helps you avoid overspending on features you don't need — or buying a system that can't grow with your property.
How DVR Systems Work and When They Still Make Sense
DVR systems connect to analogue cameras via coaxial cable (usually RG59 with BNC connectors), with a separate power cable running to each camera. Modern HD-over-coax technologies such as Hikvision's Turbo HD have breathed new life into DVRs, allowing 1080p and even 4K video to travel down existing coaxial runs.
That makes DVRs genuinely relevant in 2025 for one scenario: properties with good-quality coaxial cabling already in the walls. If your home or shop has an older analogue system and the cable runs are intact, swapping the cameras and recorder for an HD-over-coax DVR kit can deliver a major quality upgrade at a fraction of the cost of rewiring.
However, DVRs hit a ceiling quickly. Resolution tops out below what IP cameras achieve, each camera needs two cables, and advanced AI analytics are limited because the processing happens at the recorder rather than the camera. For new builds or full rewires, a DVR is rarely the smart long-term investment.
How NVR Systems Work and Why They Lead in 2025
An NVR records digital streams from IP cameras connected over Ethernet (Cat5e/Cat6) cabling. The standout advantage is Power over Ethernet (PoE): a single cable carries both power and data to each camera, halving cabling work and making installations cleaner — a real benefit in Australian brick veneer homes where wall cavity access is tight.
Because IP cameras encode video at the source, NVR systems support far higher resolutions — 4K (8MP) is now standard, and 12MP+ cameras are common for commercial sites covering wide areas like car parks and warehouse floors. Higher resolution means you can digitally zoom into recorded footage and still identify faces and number plates.
NVRs also unlock the current generation of smart features. Hikvision AcuSense distinguishes humans and vehicles from animals, rain and moving trees — dramatically cutting false alerts during Sydney's summer storms. ColorVu cameras capture full-colour footage at night, and ANPR (Automatic Number Plate Recognition) cameras log every vehicle entering a driveway or loading dock. These technologies simply aren't available on analogue DVR platforms.
NVR vs DVR: Side-by-Side Comparison for Australian Properties
For most Australians weighing up a new system, the decision comes down to five practical factors: cabling, image quality, smart features, expandability and total cost. The table below compares typical professionally installed systems in 2025.
One cost note specific to Australia: labour is often the largest part of an installation quote. Because PoE NVR systems need only one cable per camera, the higher hardware price is frequently offset by faster installation — especially in two-storey homes or commercial premises with difficult roof access.
Which Recorder Suits Your Home, Business or Rural Property?
For a typical suburban home, a 4 or 8-channel PoE NVR with 4K ColorVu cameras is the sweet spot in 2025 — colour night vision covers driveways and side access paths, and AcuSense means your phone only pings when a person actually approaches. If you're replacing an old analogue kit and the coax is sound, an HD-over-coax DVR can stretch your budget further.
For businesses — retail shops, warehouses, construction sites and strata buildings — NVR is the clear default. You'll want 16 or 32 channels, ANPR at entries, smart event search to find incidents in seconds, and the ability to add cameras as the site grows. Commercial insurers increasingly expect high-resolution, reliably stored footage, which IP systems deliver.
Rural and remote properties add another wrinkle: distance. IP cameras can sit hundreds of metres from the NVR using network switches, fibre or point-to-point wireless links — ideal for sheds, gates and stockyards. Pair an NVR with solar-powered 4G cameras at distant fence lines and you get coverage a coaxial DVR system simply can't reach. Whatever the scenario, a licensed installer can design around your existing cabling, NBN or 4G connectivity, and bushfire or coastal conditions.
Can You Mix Old and New? Hybrid and Upgrade Paths
You don't have to rip everything out at once. Hybrid recorders (sometimes called XVRs) accept both analogue coaxial cameras and IP cameras on the same unit, letting you keep working cameras while adding new 4K IP cameras in high-priority spots like entrances.
A staged upgrade typically looks like this: replace the recorder with a hybrid unit, add IP cameras where detail matters most, then retire analogue cameras as they fail. This spreads cost over time without leaving gaps in coverage — a popular approach for shops and older homes across NSW.
Whichever path you take, professional configuration matters as much as the hardware. Correct motion zones, retention settings, secure remote access and hard drive health monitoring determine whether your footage is actually there when you need it. Our five-step process — consult, design, install, configure, handover with training — finishes with you confidently pulling up footage on your phone, backed by lifetime support.
NVR vs DVR at a Glance (2025)
| Feature |
NVR (IP System) |
DVR (Analogue/HD-over-Coax) |
| Camera connection |
Ethernet (Cat5e/Cat6), PoE single cable |
Coaxial (RG59) plus separate power cable |
| Typical resolution |
4K (8MP) and above |
1080p–4K (HD-over-coax), lower in practice |
| Smart features |
AcuSense AI, ColorVu colour night vision, ANPR |
Basic motion detection, limited analytics |
| Audio support |
Native, over the same network cable |
Limited; often needs extra cabling |
| Scalability |
Easy — add cameras via network switches |
Limited to recorder's coaxial inputs |
| Best for |
New installs, businesses, rural sites, future-proofing |
Budget upgrades reusing existing coax cabling |
| Indicative installed cost (4 cameras) |
$2,200–$3,500 |
$1,600–$2,600 |
Key Takeaways
- Retail shrinkage costs Australian stores $2.7 billion per year, with theft accounting for 57% of losses
- AI-powered CCTV systems reduce shrinkage by 30-40% through real-time alerts and behaviour analysis
- Strategic camera placement at entrances, exits, POS terminals and high-value areas maximises theft deterrence
- Integration with POS systems flags suspicious transactions and sweethearting in real time
- Professional installation ensures compliance with Australian privacy laws and optimal coverage
Understanding Retail Shrinkage in Australia
Shrinkage is the silent profit killer for Australian retailers. According to the Australian Retail Association, the average store loses 1.4% of annual revenue to shrinkage — that's $14,000 for every $1 million in turnover. For a typical suburban convenience store turning over $2 million annually, that's $28,000 walking out the door each year.
The breakdown is sobering: external theft (shoplifting) accounts for 35% of losses, employee theft makes up 22%, administrative errors contribute 15%, and supplier fraud adds another 8%. The remaining 20% comes from damaged stock, pricing errors and unknown causes. What most store owners don't realise is that modern CCTV technology can address nearly every category — not just the obvious shoplifting incidents.
Traditional loss prevention relied on security guards and random bag checks. Today's AI-powered camera systems work 24/7, never take breaks, and provide court-admissible evidence when incidents do occur. The return on investment is measurable: most retailers see a 30-40% reduction in shrinkage within six months of installing a professional system.
How Modern CCTV Technology Prevents Retail Theft
The latest generation of commercial CCTV cameras goes far beyond passive recording. Hikvision's AcuSense technology uses deep learning algorithms to distinguish between humans, vehicles and irrelevant motion like shadows or animals. This means your system only alerts you to genuine threats, not every moth that flies past the lens.
Dahua's TiOC (Three-in-One Camera) range takes this further with active deterrence. When the camera detects someone loitering in a restricted area after hours, it triggers a strobe light and audible warning: 'You are in a restricted area. Security has been notified.' Most opportunistic thieves leave immediately — before they've taken anything.
For high-value retail environments, Axis cameras with perimeter analytics create virtual tripwires around expensive displays. Cross the line, and staff receive an instant notification on their mobile device with a live video feed. This is particularly effective for jewellery stores, electronics retailers and pharmacies where grab-and-run thefts are common.
Uniview's ColorHunter technology captures full-colour footage 24/7, even in near-darkness. This matters because most retail theft occurs during opening hours, but after-hours break-ins cause the biggest single-incident losses. Colour footage at 2am makes identification and prosecution far more likely than grainy black-and-white night vision.
Strategic Camera Placement for Maximum Deterrence
Camera placement is where most DIY installations fail. A camera mounted too high captures the tops of heads. Too low, and it's vulnerable to tampering. The wrong angle creates blind spots exactly where thieves operate.
Professional installers follow a layered approach. Entrance and exit cameras capture facial images at eye level — this is your primary identification tool. Overhead cameras provide situational awareness and track movement patterns. Point-of-sale cameras monitor transactions and deter sweethearting (when staff give unauthorised discounts to friends).
High-value merchandise areas need dedicated coverage with cameras positioned to capture both the product and the person's face. This dual-angle approach is critical for prosecution. A single overhead shot of someone taking an item proves nothing if you can't identify who they are.
Stockrooms and receiving areas are often overlooked, yet employee theft in these zones accounts for significant losses. Cameras here should cover entry points, storage racks and any area where stock is counted or prepared for sale. The mere presence of visible cameras reduces internal theft by up to 50%, according to loss prevention studies.
Integrating CCTV with Point-of-Sale Systems
The most powerful loss prevention tool isn't a camera — it's the integration between your CCTV system and point-of-sale software. This technology flags suspicious transactions in real time and links them directly to video footage.
Here's how it works: your POS system records every transaction, refund, void and discount. The CCTV system overlays this data onto the corresponding video. If a staff member processes an unusually high number of refunds, or applies discounts outside normal parameters, the system alerts management immediately.
Sweethearting — where employees give mates free or discounted goods — is nearly impossible to detect without this integration. The transaction looks legitimate in your POS records, but the video shows the full story. Modern systems from Hikvision and Dahua integrate with major Australian POS platforms including Vend, Square, Lightspeed and Retail Express.
The analytics go deeper. Heat mapping shows which areas of your store get the most traffic, helping you optimise product placement and staff positioning. Dwell time analysis identifies where customers spend the most time — and where they might be concealing items. Queue detection alerts you when checkout lines get too long, reducing walkouts and abandoned purchases.
Legal Compliance and Privacy Requirements
Australian retailers must balance loss prevention with privacy obligations. The Privacy Act 1988 and state-based surveillance laws set clear rules about where you can place cameras and how you use footage.
You cannot install cameras in areas where people have a reasonable expectation of privacy — change rooms, toilets, staff break rooms. You can monitor public areas, sales floors, stockrooms and receiving docks. Clear signage is mandatory: 'This premises is protected by 24-hour video surveillance' must be displayed at all entrances.
Footage retention is another consideration. Most retailers keep recordings for 30-90 days, but if an incident occurs, you must preserve that footage until the matter is resolved. Deleting evidence, even accidentally, can result in serious legal consequences.
Staff have the right to know they're being recorded. Include CCTV monitoring in employment contracts and provide training on how footage will and won't be used. Transparency builds trust and reduces the perception of surveillance as punitive rather than protective.
Choosing the Right System for Your Retail Environment
A corner milk bar has different needs than a multi-level department store. Small retailers (under 200 square metres) typically need 4-8 cameras covering entrances, POS, and high-value areas. A basic Hikvision or Dahua NVR system with 4K cameras provides excellent coverage for $3,000-$5,000 installed.
Medium-sized stores (200-800 square metres) require 8-16 cameras with more sophisticated analytics. This is where AcuSense or TiOC technology delivers real value, filtering out false alarms and focusing on genuine threats. Budget $8,000-$15,000 for a professional installation with POS integration.
Large retail environments need enterprise-grade systems with centralised management, redundant storage and advanced analytics. Axis and Uniview offer scalable platforms that grow with your business. These systems start around $20,000 but can exceed $100,000 for flagship stores or shopping centre installations.
The key is matching technology to risk. A pharmacy needs different coverage than a clothing boutique. Jewellery stores require higher resolution and more cameras per square metre than a furniture showroom. A professional security assessment identifies your specific vulnerabilities and designs a system that addresses them without over-engineering the solution.
CCTV Camera Technologies for Retail Loss Prevention
| Technology |
Key Features |
Best For |
Price Range (Installed) |
| Hikvision AcuSense |
AI human/vehicle detection, false alarm reduction, smart search |
General retail, reducing false alarms |
$3,000-$8,000 |
| Dahua TiOC |
Active deterrence (strobe + audio), full-colour night vision, AI analytics |
After-hours protection, high-theft areas |
$4,000-$10,000 |
| Axis Perimeter Defender |
Virtual tripwires, loitering detection, enterprise scalability |
Large format retail, shopping centres |
$15,000-$50,000+ |
| Uniview ColorHunter |
24/7 full-colour footage, ultra-low light performance |
Dimly lit stores, car parks, loading docks |
$3,500-$9,000 |
| POS Integration |
Transaction overlay, exception reporting, sweethearting detection |
All retail environments with POS systems |
Add $1,500-$3,000 to base system |
Key Takeaways
- Dome cameras suit discreet indoor and covered outdoor areas; bullet cameras excel at long-range outdoor coverage.
- Bullet cameras act as a visible deterrent, while domes make it harder to tell where the lens is pointing.
- Vandal-resistant domes (IK10-rated) are best for accessible mounting heights and public-facing areas.
- Australian conditions matter: coastal salt air, heat and storms influence housing choice and IP ratings.
- Most professionally designed systems mix both styles for complete coverage.
- A licensed installer will match camera style, lens and technology like ColorVu or AcuSense to each location.
What Is the Difference Between Dome and Bullet Cameras?
The names describe the housing shape. A dome camera sits inside a rounded, tinted dome enclosure, usually mounted flush to a ceiling or eave. A bullet camera has a cylindrical, protruding body that points visibly in one direction, typically wall-mounted under an eave or on a bracket.
Both styles are available across the professional brands we install, including Hikvision, Dahua, Uniview and Axis, and both can deliver identical image quality, resolution and smart features. The real difference is mechanical: how the camera mounts, how obvious it is, how it handles weather and tampering, and how far it can see. Choosing between them is less about which is 'better' and more about which suits each specific mounting point on your property.
Dome Cameras: Strengths and Weaknesses
Dome cameras are the discreet option. Because the lens sits behind a tinted dome, people on site cannot easily tell which direction it is facing, which makes them excellent for retail floors, offices, foyers and anywhere you want coverage without an obvious 'you are being watched that way' signal. Turret-style domes, a popular variation, remove the outer bubble to eliminate infrared reflection issues at night.
Their compact shape also makes them harder to grab, knock or redirect. Vandal-resistant models carry IK10 impact ratings, meaning the housing can withstand direct strikes, which is why domes are the standard choice at accessible mounting heights such as shopfronts, school corridors, apartment common areas and car parks.
On the downside, domes typically have shorter infrared night-vision ranges than bullets, the dome bubble can accumulate dust, spider webs and water spots that soften image clarity, and adjusting the viewing angle after installation takes a little more effort. In coastal suburbs, salt film on the dome needs periodic cleaning to keep footage sharp.
- Best for: indoor areas, eaves, shopfronts, offices, apartments and vandal-prone spots
- Typical IR night range: 20 to 40 metres
- Look for: IK10 vandal rating, IP66 or IP67 weather rating for outdoor use
- Watch out for: dome bubble maintenance in dusty or coastal locations
Bullet Cameras: Strengths and Weaknesses
Bullet cameras are built for distance and deterrence. The elongated body houses larger lenses and more powerful infrared LEDs, so bullets routinely deliver 40 to 80 metres of night vision, making them the natural pick for driveways, side passages, fence lines, yards, warehouses and rural properties. Their unmistakable shape is itself a security feature: intruders can see exactly what is being monitored, and that visible presence discourages opportunistic crime before it happens.
Bullets are also quicker to aim and re-aim, which matters on construction sites and commercial premises where coverage needs change. Because the lens is exposed rather than behind a bubble, there is no dome reflection to degrade infrared performance, and the built-in sun shield helps in harsh Australian afternoon sun.
The trade-offs: bullets are easier to grab, knock or spray-paint if mounted within reach, they are more visually prominent (some homeowners find them industrial-looking on a brick veneer facade), and spiders love building webs across the protruding body. At low mounting heights in public areas, a dome is usually the smarter call.
- Best for: driveways, perimeters, backyards, warehouses, farms and long sightlines
- Typical IR night range: 40 to 80 metres
- Look for: IP66/IP67 rating, motorised varifocal lens for flexible framing
- Watch out for: mounting within reach, spider webs, visual prominence
How Australian Conditions Affect Your Choice
Our climate is tougher on cameras than most. Along the NSW coast, salt-laden air corrodes cheap housings and fogs dome bubbles within a year or two, so we specify IP66 or IP67-rated housings with proper seals regardless of style. In western Sydney and regional areas, summer heat inside a roof cavity or on a sun-baked Colorbond wall can push consumer-grade cameras past their operating limits, which is one reason we only install professional-grade hardware rated to 60 degrees Celsius or higher.
Storm season brings driving rain at odd angles, so under-eave mounting suits domes, while exposed fence-line runs favour bullets with deep sun shields. In bushfire-prone zones, ember attack and radiant heat argue for metal housings mounted on non-combustible surfaces. And on rural properties running on 4G or solar power, bullet cameras with long-range Starlight or ColorVu sensors often win because they cover more ground per camera, reducing the total unit count and bandwidth load.
Matching Camera Style to Each Area of Your Property
In our design consultations, we walk the property and assign a style to each location rather than picking one style for the whole site. Front porches and entry doors suit compact domes or turrets paired with a video doorbell. Driveways and side gates get bullets with ANPR-capable or AcuSense sensors to capture vehicles and filter out false alarms from pets and swaying gum trees. Backyards and pool areas usually take a mix: a wide-angle turret near the house and a long-range bullet covering the rear fence.
Inside, domes dominate because they blend into ceilings and resist tampering. Retail stores run domes across the floor with a bullet watching the loading dock. Warehouses flip that ratio, with high-mounted bullets covering racking aisles and domes at pedestrian entries. Features like Hikvision ColorVu for full-colour night footage, AcuSense human and vehicle detection, and Power over Ethernet (PoE) for reliable single-cable installs are available in both form factors, so you never sacrifice capability for shape.
Why Professional Design and Installation Matters
The dome-versus-bullet question is really a system design question. Lens focal length, mounting height, angle of incidence, lighting, cabling runs and NVR configuration all interact, and a camera that is perfect on paper can underperform badly if it is mounted two metres too low or pointed into the setting sun. As licensed and insured NSW installers, we handle the full process: an on-site consult, a tailored design, professional installation, network and remote-viewing configuration, and a proper handover where we train you on the app.
Every system we install comes with lifetime support, and we back it with professional-grade Hikvision, Dahua, Uniview and Axis hardware rather than consumer DIY kits. If you are weighing up dome versus bullet cameras for your home or business, the fastest way to a confident answer is a free, no-obligation quote with a design that maps each camera style to the exact spot it will protect.
Dome vs Bullet Cameras at a Glance
| Feature |
Dome Camera |
Bullet Camera |
| Typical night vision range |
20-40 metres |
40-80 metres |
| Visual deterrence |
Low – discreet, direction hidden |
High – clearly visible and directional |
| Vandal resistance |
Excellent (IK10-rated models) |
Moderate – easier to grab or redirect |
| Best mounting locations |
Ceilings, eaves, shopfronts, indoor areas |
Walls, fence lines, driveways, perimeters |
| Maintenance needs |
Dome bubble needs cleaning in dusty or coastal areas |
Prone to spider webs across the housing |
| Aiming and adjustment |
More effort once installed |
Quick to aim and re-aim |
| Typical installed cost (AUD) |
$350-$600 per camera |
$350-$650 per camera |
| Ideal property uses |
Retail, offices, apartments, entries, car parks |
Driveways, yards, warehouses, farms, construction sites |
Key Takeaways
- DIY kits start around $300–$800, but hidden costs often double the real spend
- Professional installation typically costs $1,200–$3,500 for a 4–8 camera home system
- Poor camera placement is the number one DIY failure — and the most expensive to fix
- Professional-grade Hikvision and Dahua hardware outlasts consumer DIY kits by years
- Licensed NSW installers provide compliance, warranty protection and insurer-recognised documentation
- Over five years, professionally installed systems usually deliver lower total cost of ownership
The Real Upfront Cost of DIY CCTV Kits
Walk into any electronics retailer and you'll find DIY CCTV kits promising complete home security for a few hundred dollars. A four-camera wireless kit from a big-box store typically costs between $300 and $800, which looks compelling next to a professional quote. But that sticker price rarely tells the full story.
Most DIY kits ship with consumer-grade cameras rated for two to three years of service, limited night vision, and cloud storage subscriptions that cost $10 to $30 per month forever. Add a decent microSD card or hard drive, a ladder, cable clips, drill bits, silicone sealant and possibly a Wi-Fi range extender, and the real spend climbs quickly. Many homeowners also discover their kit can't cover a double-storey brick veneer home without buying additional cameras or a mesh network — costs that were never in the original budget.
What Professional CCTV Installation Actually Includes
A professional installation from a licensed and insured NSW installer is a complete service, not just hardware. At Aussie CCTV Cams, our five-step process covers an on-site consultation, a custom camera design based on your property's sightlines and lighting, installation with proper cable management, network and remote viewing configuration, and a full handover with training so you actually know how to use your system.
We install professional-grade hardware from Hikvision, Dahua, Uniview and Axis — cameras with technologies like ColorVu full-colour night vision, AcuSense human and vehicle detection, and Starlight low-light sensors. These aren't available in consumer DIY kits, and they make the difference between footage that identifies an intruder and footage that's a blurry grey shape. Cabling is run through roof cavities and wall cavities using Power over Ethernet (PoE), so there are no batteries to recharge and no Wi-Fi dropouts during a storm.
Hidden Costs That Catch DIY Installers Out
The most expensive DIY mistake is poor camera placement. Cameras mounted too high capture the tops of heads; too low and they're easily disabled. Facing a camera into the afternoon sun washes out the image, and pointing it at a busy street floods you with false motion alerts. Fixing these mistakes means re-drilling, re-cabling and patching holes — often costing more in time and materials than doing it properly the first time.
Other common hidden costs include Wi-Fi cameras dropping offline during NBN congestion, flat batteries in winter, corroded connectors in coastal salt air, and cloud subscription fees that exceed the hardware cost within two to three years. If a DIY system fails to record a break-in because a camera was offline, the true cost isn't the hardware — it's the uninsured loss and the insurance claim you can't support with footage.
DIY vs Professional: Five-Year Cost Comparison
When you compare total cost of ownership over five years, the gap narrows dramatically and often reverses. A DIY kit with cloud subscriptions, replacement batteries, one or two failed cameras and a Wi-Fi extender frequently ends up costing $1,500 to $2,500 — with no warranty support, no compliance documentation and footage quality that may not satisfy police or insurers.
A professionally installed four-camera PoE system with an NVR typically costs $1,200 to $3,500 installed, with no ongoing subscription fees, a manufacturer's warranty, and lifetime support from your installer. The table below breaks down the realistic five-year comparison for a typical Sydney suburban home.
When DIY Makes Sense — and When It Doesn't
To be fair, DIY has its place. A single video doorbell or a temporary wireless camera for a rental property can be a sensible DIY job. If you're technically confident, comfortable on a ladder, and only need one or two cameras in easy-to-reach spots, a quality kit can work.
But for whole-home coverage, double-storey properties, businesses, farms and construction sites, professional installation is almost always the better investment. Commercial premises often have insurance and compliance obligations that require licensed installation, and rural properties need hardware engineered for heat, dust, storms and 4G connectivity — not consumer gear designed for a Californian garage. If your property is in a bushfire zone or a coastal suburb, professional-grade housings and connectors aren't a luxury; they're essential.
The Long-Run Verdict on Value
Saving money on security only counts if the system works when it matters. A professionally designed and installed CCTV system costs more on day one, but it delivers reliable footage, no subscription fees, warranty protection, insurer-recognised documentation and support for the life of the system. Over five years, that typically works out cheaper than replacing, repairing and subscribing to a DIY kit — and it actually protects your property in the meantime.
If you're weighing up your options, the smartest first step costs nothing: get a free quote and site assessment from a licensed NSW installer, and compare it honestly against the true cost of doing it yourself.
DIY vs Professional CCTV: Five-Year Cost Comparison
| Cost Factor |
DIY Kit |
Professional Installation |
| Upfront hardware |
$300–$800 |
Included in quote |
| Installation labour |
Your time (1–2 days) |
Included, licensed and insured |
| Cloud storage fees (5 years) |
$600–$1,800 |
$0 (local NVR storage) |
| Replacement cameras/batteries |
$200–$500 |
$0 under warranty |
| Wi-Fi extenders/accessories |
$100–$300 |
$0 (PoE cabled system) |
| Reinstallation after placement errors |
$150–$400 |
$0 (designed correctly first) |
| Typical 5-year total |
$1,500–$2,500+ |
$1,200–$3,500 |
| Warranty and support |
Limited, DIY troubleshooting |
Manufacturer warranty + lifetime support |
Welcome to WordPress. This is your first post. Edit or delete it, then start writing!